
Read First
This tutorial is only suitable if you planing to clone your WordPress website to the same server as your original installation!
Making a Google search on the topic will return a full page of similar articles on how to clone your WordPress website using the Duplicator Pugin.
Maybe this works for most of the users, but when I tried this method the plugin couldn’t generate my backup file because of the big file sizes.
The conventional method of copying the files manually, exporting/importing the database, and rewriting the wp-config.php file is also related to several big downloads and uploads.
I needed another method…
and I found it!
Cloning your WordPress Site with Softaculous Staging
Most web hosts use cPanel, so that would be a requirement. Softaculous is a software that lets you install the most popular apps with a few clicks and it comes standard with cPanel.
Let’s start with staging your website. The process is very simple however, there are some things you need to prepare first.
Create a Subdomain
It’s a test website, so I assume you’ll use something like “test.yourdomain.com”. If you have a separate domain where you want to clone your website, skip this step and just chose it from the dropdown with options later.
It’s better to use staging on a subdomain rather than a directory on your main domain.
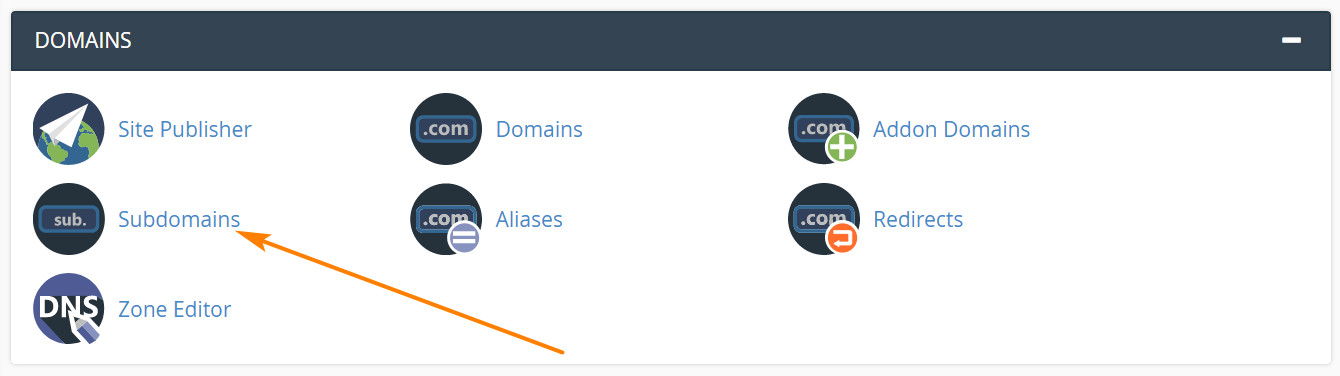
In your cPanel main page find the Subdomains icon and create your test subdomain. The process is as simple as that.
Create Staging with Softaculous
Now open the Softaculous app installer. Usually, the menu is somewhere on the bottom of the cPanel home page.

Note: The hosting companies have different names and places for the Softaculous app, so make sure you search carefully.
The home screen of Softaculous will show you different CMS platforms to choose from, you shouldn’t have any difficulties finding the WordPress logo quickly.
Scroll down and you’ll see a list of your active WordPress installations.
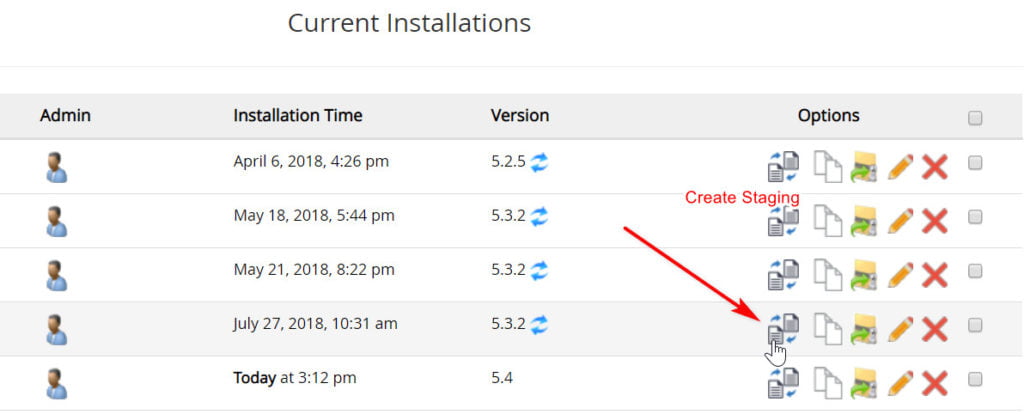
In the options column, we have a few options, but the one we looking for is “create staging”.
[box title=”” bg_color=”#ddb1b1″ align=”left”]
Can’t see your Website on the list?
This list might not show your WordPress website for several reasons, the most common being the fact you haven’t use Softaculous for the initial install. Don’t worry there is an easy way to fix this.
[/box]
On the overview screen find the Import option form the top menu
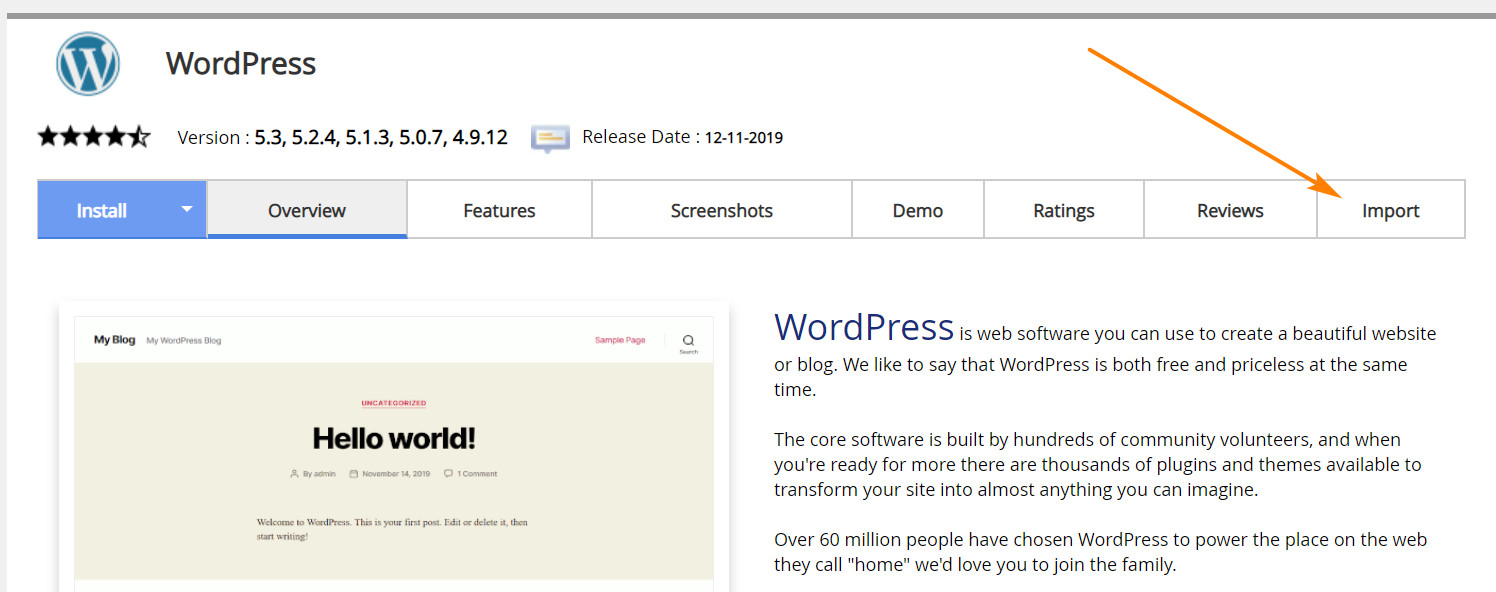
Select if you use an HTTPS protocol and select your domain from the dropdown. Click import and this will add your site to the list of current installations.
Note you can even import websites on remote servers. This is more complicated and we won’t get into details now.
Final Step
Now you see your site on the installations list and you are ready to clone it!
Just choose the subdomain you have already created and the protocol (https or http). Softaculous will automatically create a new database and user and handle everything else for you.
Preview the information and start the staging process. It really takes just a few seconds to complete.
Tips for your new Clone
Right after you successfully clone your website make sure you head to Settings > Reading in your WordPress admin dashboard and turn on the ‘Discourage search engines from indexing this site.
If you want to hide the clone while you test things on it you can also install some kind of “Maintenance mode” plugin.
Pushing your Copy to Live
The final step is to push your new website to live.
When you finish the work on your staging copy, simply head back to the Softaculous app and you will notice a new icon next to the copied website.
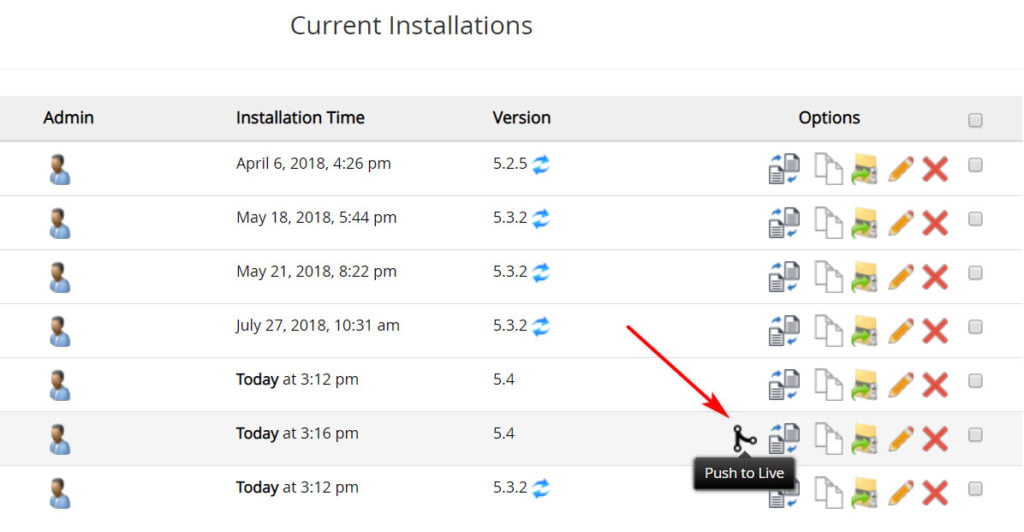
Click the icon and there is one final confirmation button you have to click. I suggest you to use the default options if you don’t know what you are doing. This is a safe way to push your full WordPress website without any losses.
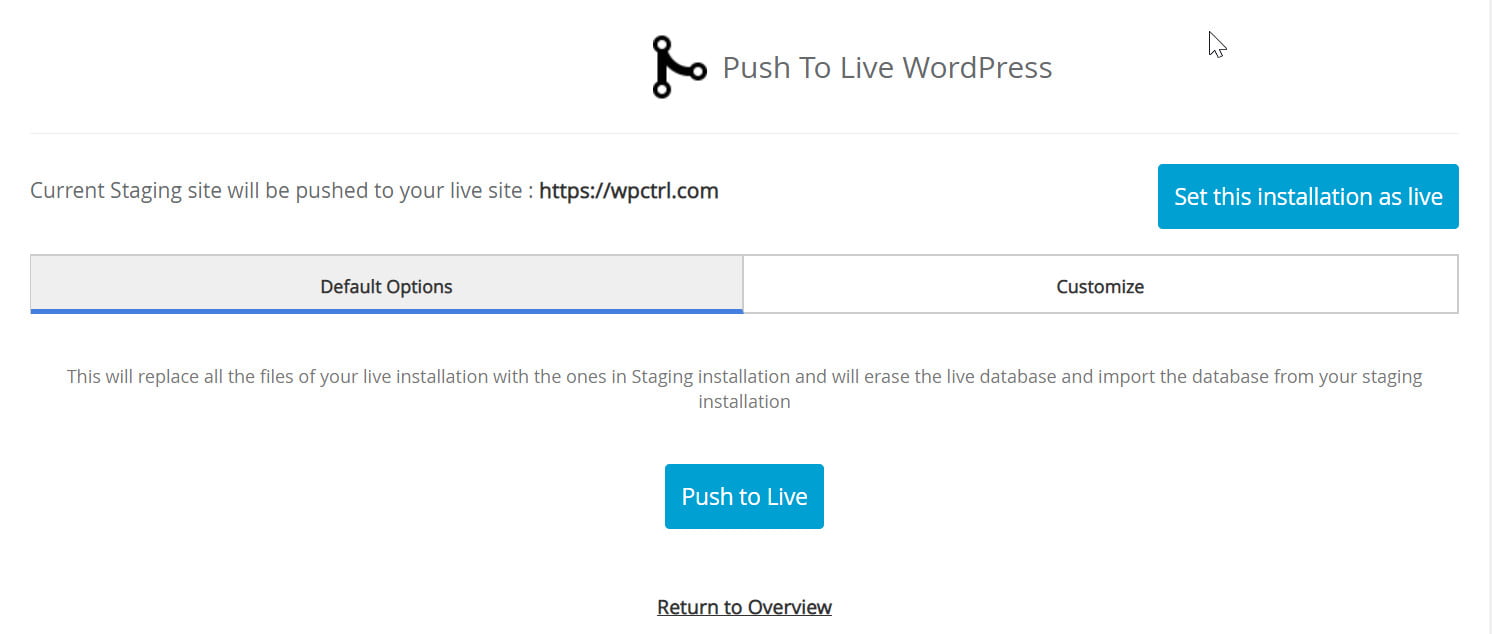
The process again takes no more than 2-3 minutes.
When you head back to your website you will see your new website. Working just like it was always there.
Site Staging with SiteGround 👌
Staging is an easy method to clone your site for development purposes. It creates a safe password-protected environment, where you can implement all your changes without worrying if they will break your site or not.
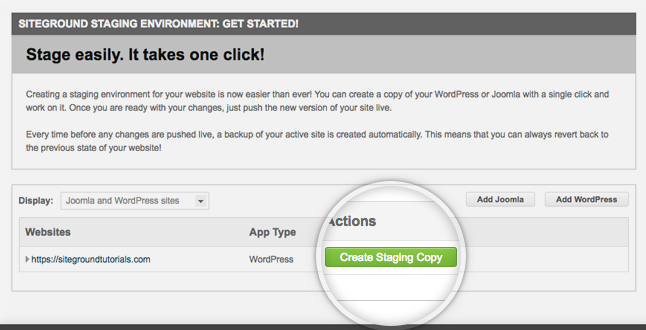
SiteGround has a different staging interface from most hosting companies.
After logging in to your cPanel, you will see the Staging icon:

Next, simply choose the WordPress website you want to copy and click the ‘Create Staging Copy’ button.
Complete the process and a ‘Menage Staging Copies’ button will appear on your dashboard.
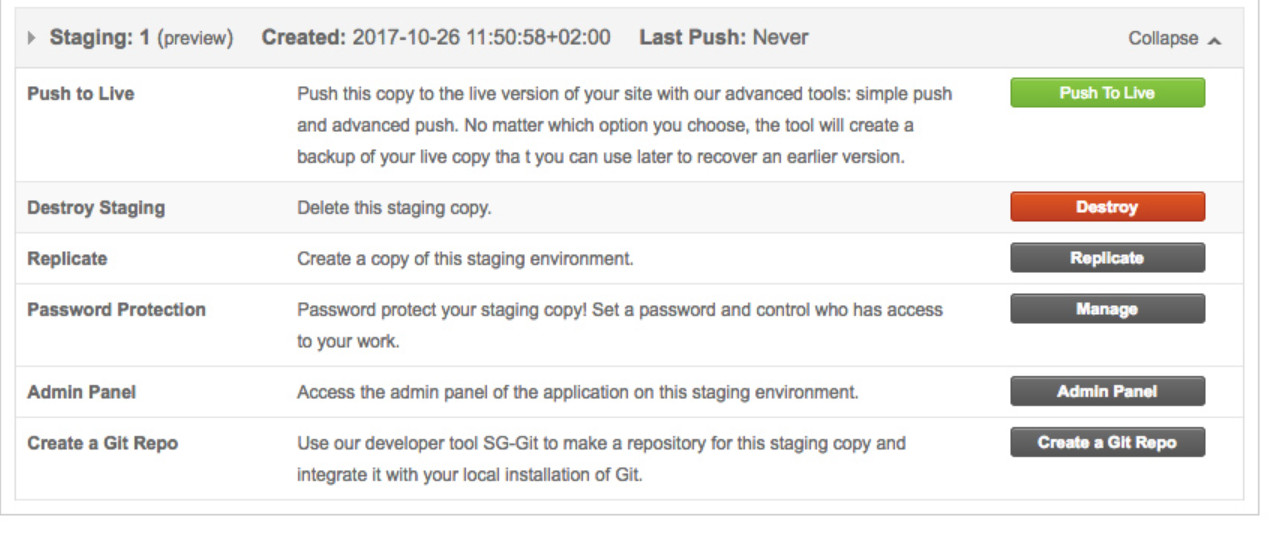
Here you can access your admin area and start making changes to your website, without hurting your live website.
The best part is, once you are happy with the changes and everything is ready to go live, you just press the ‘Push to Live’ button and the tool will do the rest. Your updated website will now load on your original domain!
Our Recommendation for Easy WordPress Staging
There are paid staging tools or additional costs to add this service to your hosting plan, but with SiteGround staging comes standard with every hosting plan.
SiteGround is by far the best Price/Speed/Support hosting company for your WordPress projects.
Disclosure: Some of the links on the page may contain a ref code (affiliate links), that tells the other side that we have sent you. If you liked what we suggest and you make a purchase, we may receive a commission.