When it comes to creating a website and online appearance, a lot of people are still imagining some complicated scenarios, including thousands of dollars and problems – lots of problems.
Today, more than ever there are multiple ways of doing things.
Who is this post for?
If you search for the best (and easiest) way to start a website and you have no previous experience with things such as – hosting, domains, cPanel, and WordPress – this post will help you do this.
[su_divider top=”no” style=”dashed” divider_color=”#ff6a06″]
In my first year in university, I remember one day, one of my Coding teachers – a guy with more than 30 years of experience in the field showed me a website he made for his daughter’s photography hobby.
He used some fancy jQuery menus, PHP, and who knows what else.
And when it loaded in the browser I was like, this…seriously?
Not to be disrespectful I hold my thoughts to myself and I waited to see where this is going.
He knew from our previous conversations I was making websites with WordPress, so he asked me the question directly.
Can we make this better your way? (at that time he had not even heard of WordPress).
Yes, yes we can I replied.
[su_divider top=”no” style=”dashed” divider_color=”#ff6a06″]
That was 2008 when there were no page builders, but I have already found this true heaven of premium themes – ThemeForest, and I was feeling like I can create anything.
I’m sharing this story with you to illustrate how different things were 10+ years ago, and how today the people who are building websites are no longer those highly experienced professionals, agencies, and web designers.
Today anyone can build the website of their dreams, to make it functional, beautiful, fast, and working.
It’s all Possible Thanks to WordPress
WordPress is the way to go for several years now, anybody is using it, from your local news website to the e-commerce store you buy your dog food, and even the big million dollar marketing companies.

Here we’ve put together all the necessary steps to get your site live in no time!
Step 1: Choose a Hosting and Domain Name for your Website

Let’s assume you’ve already decided what you are going to write about, what purpose will serve to your potential visitors and you have some idea how it will look like. Now it’s time to get real.
The requirement to go online is to have a place to host your website files (server).
You can do it with free hosting and domain, but if you want to take full advantage of having your website and do it with a style, you want to use a premium service.
What’s the point of paying for hosting and domain and not go with a free service?
- Hosting plans starts for less than $2/month with 24/7 support for all your newbie questions and struggles!
- You will have your unique ‘whateveryouwant.com’ + your own e-mail address.
- You will rank better in search results.
- You will get recognized for your brand.
- You can make use of the tons of built-in features.
Based on your Geolocation you can go with a local hosting provider or chose some of the big players. You want to start with the cheapest shared hosting plan which is between $2 and $5 /per month.
I can suggest you choose from SiteGeound for beginners with small websites, or Scala Hosting for the more experienced users with heavier websites and more traffic. I tested their services many times and everything is at the top level.
[alert-note]Bonus tip: When you purchase an annual hosting plan most of the companies will give you a domain name for FREE! Also paying for 12 months will save you some money.[/alert-note]
What to keep in mind
All companies will give you a better price for the first year. Take that into consideration and be prepared for your second bill which will be 20%-50% more expensive.
Buying a Domain Separately
It’s really easy to get your domain and hosting from the same provider.
But later your renewal price (offered by the hosting company) won’t be as cheap as the one given by a domain registrar.
Domain registrars are companies that are specialized in domain names only.
With these companies, you will get a better price and some additional features that are absent if you buy your domain from your hosting company.
One of these features is domain privacy (WHOIS Privacy), which you will get for free from some of the registrars!
When you purchase your domain separately, you have to set it to point to your hosting servers (DNS).
[su_divider top=”no” style=”dashed” divider_color=”#d5d5d5″]
I personally suggest you get all your domains separately from NameSilo.com, or InternetBS.
This way you will keep track of your domains easily and even if you change your host in the future you won’t have to transfer domains.
The domain prices are constantly lower compared to other big companies (e.g. GoDaddy).
You can also opt-in for FREE domain privacy (hide all your personal data).
[su_divider top=”no” style=”dashed” divider_color=”#d5d5d5″]
Step 2: Install WordPress on your Website
At this point, you have purchased your hosting with your domain name. Congrats!
Now it’s time to get some real work done.
You will get an e-mail from your hosting provider with instructions and login credentials.
All shared hosting plans are coming with a control panel (cPanel in 90% of the time).
cPanel is making it easy to manage all aspects of your website – installing apps, creating e-mail accounts, tracking visits, and much more.
Once you log in to your cPanel, you will see a dashboard rich in icons, but don’t panic you will use just a few of these for now.
Softaculous is making it extremely easy to install the WordPress CMS to your domain within seconds!
Just click on the WordPress icon shown above, on the next screen you will see an introduction about WordPress and a blue button saying “Install Now” click it and fill in the required fields.
The Softaculous will handle the rest of creating a database and installing your WordPress.
On the next screen, you will see your login address, in order to access the WordPress admin dashboard and start creating your website!
Your default login address after installing WordPress will be: yourdomain.com/wp-admin
Congratulations! Now you have a live website.
You will soon realize it’s blank and not looking very fabulous, but don’t worry, things are about to change!
Pro Tip: It’s a good idea to enable a Maintenance mode plugin while you’re building your website.
Step 3: Picking a Theme for Your New Website
Themes and Plugins are the building blocks of any WordPress website. There is an abundance of both free and paid themes out there to choose from.
If you are new to WordPress I suggest you start exploring the free themes to get familiar with the way themes work in general, after that, you can choose to go with a premium theme.

The WordPress repository is full of free themes to choose from. You can also install themes directly within your dashboard.
Most of the themes come with a ‘Theme Options’ panel where you can set the basic things like your website’s logo, typography, page layout, header, footer styling, and more, depending on your theme.
As you will find that most of the free themes lack features and custom options, but you can still create a good-looking and functional website!
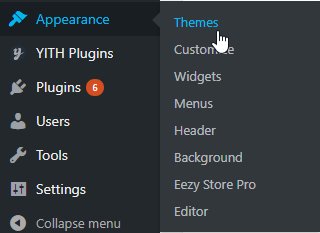
In the Appearance menu, you are also setting your website’s menus and sidebar widgets – fundamental elements that every website has.
You want to keep it simple and clear, only because you can, doesn’t mean you have to put all kinds of content in your sidebar. The same applies to your menu, add only the main pages of your site and really ease up your users’ navigation.
Useful Tip: Premium themes have the option to install Demo Content and sample data and get the exact same look as the demo you were looking for before you decided to buy the theme. New users can benefit greatly from this feature!
The largest themes marketplace for WordPress Themes is ThemeForest.
Step 4: Creating and Publishing Your Content
When you decided to build your own website, you probably had an idea of what you are going to put in it.
In WordPress content is managed in two main ways – through Posts and Pages. In pages, you want to put all the mandatory stuff like the About us page, Contacts page, Information, Terms, etc. while in Posts you are adding your unique topic-related content, based on your site niche.
WordPress comes with an easy-to-follow text editor to help you structure your posts and pages in the best possible way.
Read Also: 5 Free Graphic Content Resources to Keep Your Blog Posts Fresh
Your pages & posts will contain your uniqueness and value to the world so you will want to make sure you are doing it right.
Step 5: Develop your Website and Gain Popularity
Whatever your purpose is, one thing is almost for sure – you want to get your website’s message spread.
The Internet is tremendously growing every other year. If some advice was proven to work in the past it has a great possibility to be useless today.
The best thing you can do is follow the main trends in online business and trying to implement them on your website.
One thing is for sure – uniqueness will always be a good bet. So try to offer some of your very own receipts to the table and with the right tools and knowledge, I’m sure you will do fine with your website project!
[box title=”” bg_color=”#efefef” align=”left”]
Save on Themes and Plugins
You can subscribe to Envato Elements and get instant access to over 1000 WordPress themes and plugins for a monthly fee of $29 and later unsubscribe.
It’s a good way to test different themes and plugins and chose the right one. It is crucial for your website health to never use nulled themes.
Bonus: You will also get additional items for your project such as stock photos, illustrations, icons and more.
[button href=”https://wpctrl.com/click/elements/” style=”flat” size=”medium” color=”#7c0e84″ hovercolor=”#61007a” textcolor=”#ffffff” texthovercolor=”#ffffff” target=”_blank”]Try it Now[/button]
[/box]
Disclosure: Some of the links on the page may contain a ref code (affiliate links), that tells the other side that we have sent you. If you liked what we suggest and you make a purchase, we may receive a commission.


Nice article.Really Helpful.
Thanks , For Sharing This Articles
Keep sharing and have a great time blogging.
Amazing……
It is a very great post.
Thanks for sharing it.
bluehost is actually cheap and easy to operate! I prefer bluehost 🙂
Thanks for sharing such a wonderful article…..I purchased Godaddy hosting with the free domain….But server response time is 0.70s to 1 sec which was disappointed for me but my other friends said their Godaddy hosting is working fine…
Hi, I personally use Godaddy only for domains, there are far better hosts out there in terms of speed and quality!